
Our Cost-Effective driveway Resurfacing Project
This poor 70’s side-split is loaded with potential, but, man did we ever need to fix up the old driveway with some cost-effective driveway resurfacing. The dated square and hexagon patterned pink interlocking stone probably looked awesome along with the almond-coloured toilet and sink. The height of design style back in 1982. However, today this just wasn’t going to cut it.
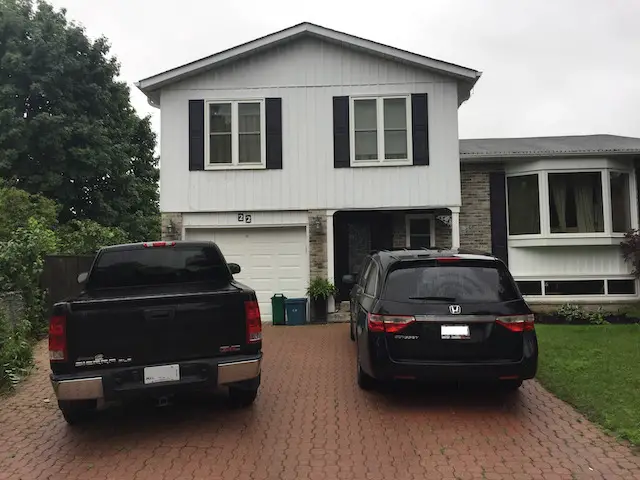
This is what we started with, and it’s not horrible, but the stones have shifted a lot (to stop this from happening to your driveway, keep the cracks full with polymeric sand). Weeds are growing between them, and the weight of the vehicles over the years has caused the stones to sink into groves, kinda like speed bumps 🙁 The pink color didn’t do our home any favors either.
Our home borders a walkway that provides access to the main street behind us. Along the walkway is a 4-foot chain-link fence and right beside that was a retaining wall made of 4×4 lumber, to hold the driveway stones in place. The wood was all rotten, and weeds had started to take root between the fence and driveway. I liked how the retaining wall separated the house and path, so we kept that in the plan.
Landscape and Driveway Project Planning
We started this driveway project and our patio project at the same time. It made sense because the company we selected to do the stonework, didn’t do asphalt driveways, and vice versa. So the first guys on the scene were the demo crew. They hauled away all the old stone and wood and dumped a bunch of new gravel screening down to make it nice and flat again. It stayed that way for a few weeks while we drove and parked on it. That compacted the stones so the new driveway wouldn’t sink.
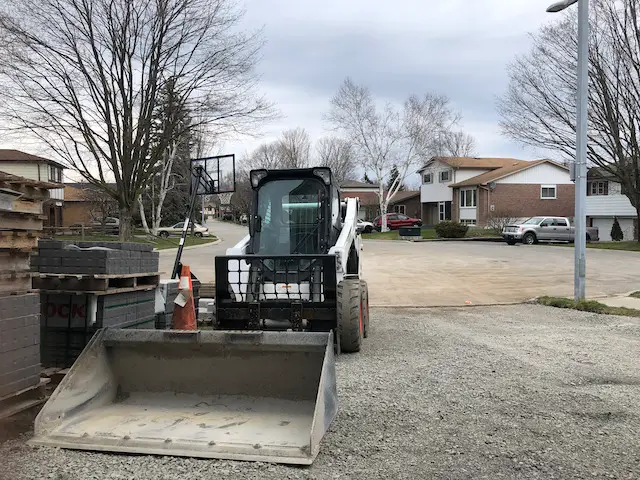
Shortly after, our materials started to arrive, from our other contractor. The plan here was to lay a stone border and retaining wall around the outside of the driveway, as well as an “apron” across the side gate, garage and entryway. That meant the stone guys had to finish their work before the asphalt guys could pave the driveway.
I didn’t get much opportunity to take pictures of the stone-laying process or the paving. Both went very quickly after the initial demo. We had the same stone contractor doing work in our backyard too, so they stuck around for a few days before the asphalt guys came back to pave.
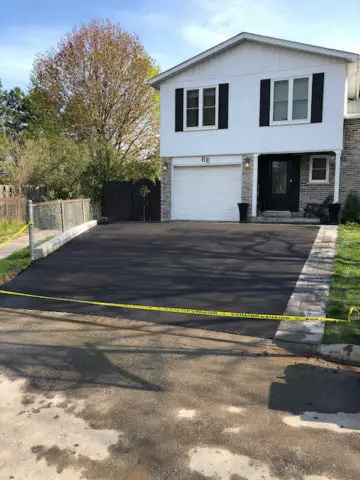
The end result is below. Fantastic and cost-effective curb appeal update, and it’s totally un-crappy now!!
I mentioned how this was a cost-effective project so I wanted to get into why this particular project was “cost-effective”. Let’s face it, this stuff costs money.
How did we keep the cost of replacing our driveway in check?
Choosing the right materials for the look and budget.
This is our cost-effective driveway resurfacing process. To replace the existing stone with a new stone was 2-3x the cost of asphalt. I actually really like nice black asphalt driveways, but they still need something to keep them interesting. To compromise we ran a stone border alongside the driveway and between the door and the fence gate. This actually made our driveway a little wider too which we needed. If you already have an asphalt driveway, you can fill in the cracks and seal the asphalt easily and cheaply. An asphalt sealer like this works great. To fill the cracks there are a couple of options. This one looks fun but if fire isn’t your thing, try a crack filler like this. I fill the cracks before applying the sealer.
Along the sidewalk side of the driveway, we replaced the rotten wooden retaining wall with a small stone wall. We didn’t really need this, but it makes cleaning the driveway much easier, and it keeps all the stuff growing in the path, out of the driveway.
Choosing a combination of stone and asphalt reduced our cost considerably, and still gave us the look we were going for.
Cost-Effective Driveway Resurfacing and Landscaping Project Timing
Second, we managed the job ourselves so there was no contractor in the middle. We coordinated our backyard and front yard work so both jobs could be completed at the same time, saving a trip for the landscaper.
We could have further reduced the cost if we removed the old stone driveway ourselves.
Lastly, we booked our job and put a deposit down the previous year and timed it so we would be one of the first jobs that season. Securing work for the next season worked great for all the services we used so some were happy to discount us. It also meant that we wouldn’t see our price jacked up during the “busy season”. Be cautious and check references for the contractors you use. It’s easy for them to disappear with your deposit. Our landscaper is local, we have his address, and have inspected previous jobs he’s worked on.
The asphalt contractor does large commercial jobs and has been in business for 50 years, so we were confident they weren’t going anywhere.

