
How to build a simple DIY Carport for additional outdoor storage, with basic lumber and scrap materials.
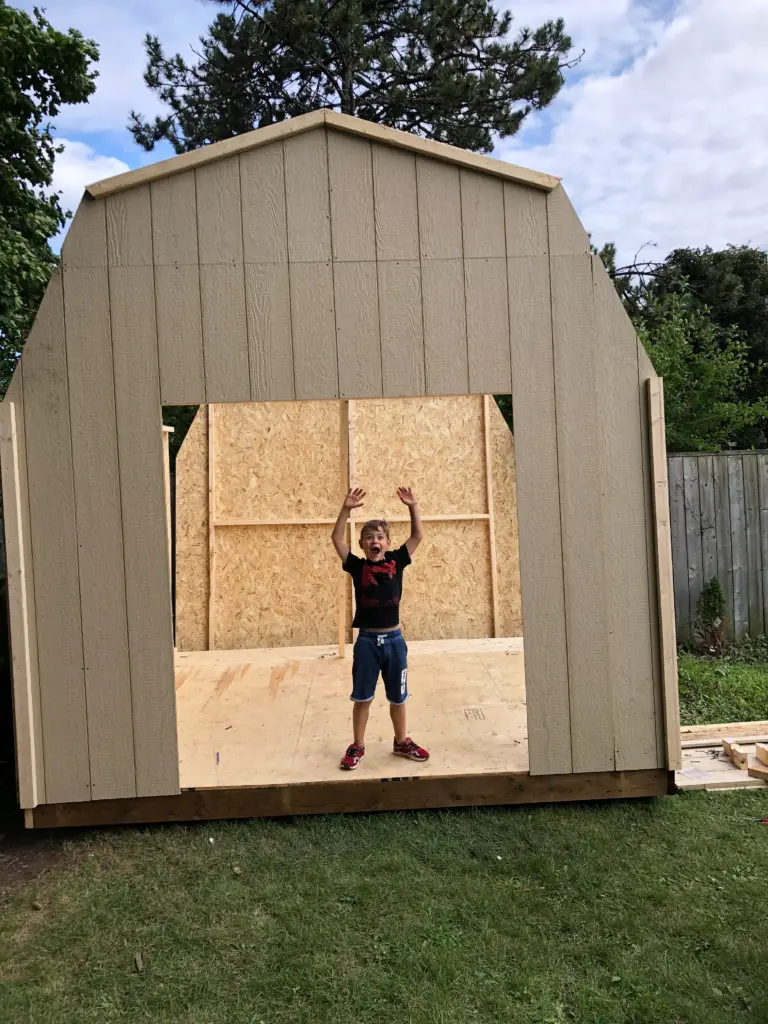
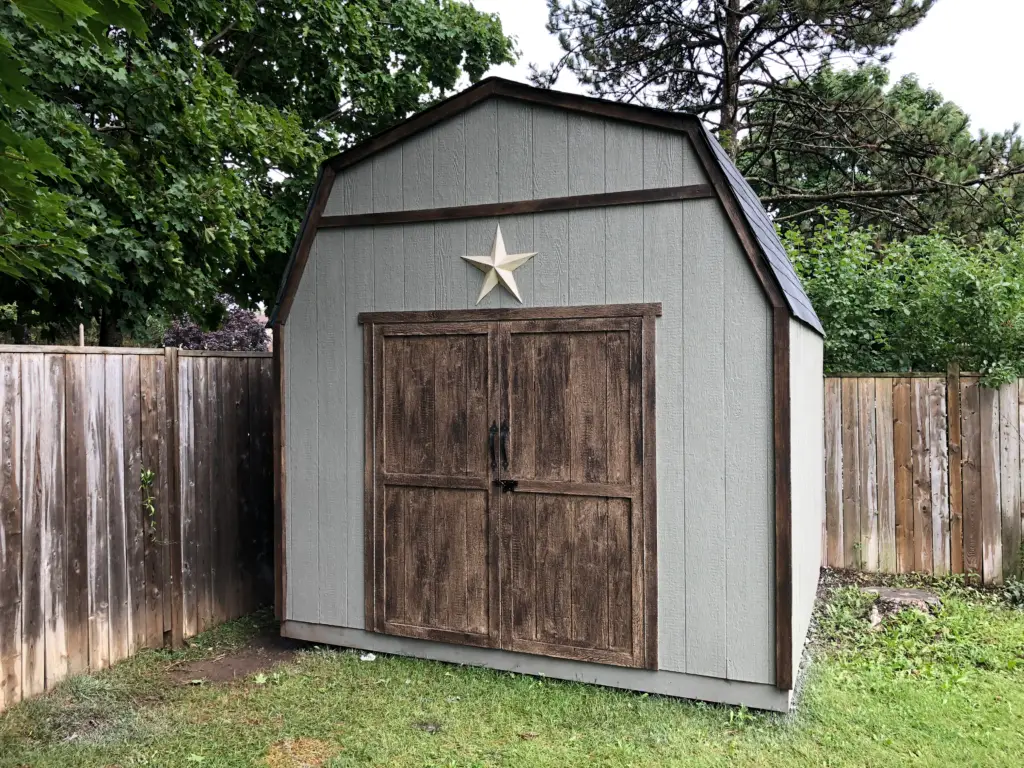
Several years ago we built this large barn-style shed (from a kit), to store tools and equipment. It has worked great, but it’s getting full, and I really wanted to get some extra storage space to use in the winter.
I liked the idea of adding a “Car Port” style garage like the image below, to the side of the shed, for some additional outdoor storage. It would be perfect for bikes, lawnmower’s and other outdoor kinda stuff. If you’re looking for more of a storage locker, check out this one from FamilyHandyMan

Problem: The cost of lumber has gone through the roof due to COVID. It would cost 3-4 times as much to build this now compared to a year ago. Here is a great article from Fortune, if you want to read more about the ridiculous cost of lumber.
Solution: Scavenge the scrap pile.
I collected a bunch of pallets over the last year. Some were made with thin plywood that I usually just cut up for the fireplace. I happen to have a pallet with a 4×6′ piece of ply attached, so, here you have it. How to build an approximately 4×6′ carport out of mostly scrap. I did need to pick up about $40 in dimensional lumber (1×6, 2×4, 2×3) which should have cost around $16, in the before times.
Where to start when building a DIY lawnmower shed?
This project started at the top, and from there I determined where I needed posts, and what level they should be. The only reason for this is because I didn’t have 4×4 posts long enough for the full height. you’ll see my creative solution below.
Step one was to attach a 2×4 header board to the existing shed to support the new roof. I attached this just below the current roofline, low enough that I could tuck the new shingles under the existing ones.
Before attaching my pallet to the header board, I cut some 2×3’s and attached them to each end of the pallet.

*Important – I cut the ends of the 2×3 roof supports slightly longer than the pallet for 2 reasons.
- This provides an edge to attach a finished board to on the outside.
- I used these supports to cut an angle for the roof slope. In this case, I went with 15 degrees of slope. Gradual enough that I still get lots of height, but the water still runs off.
This is a great all in one tool for marking and finding angles, with a level.

Next, I used my ladder and some scrap wood to support the end while I attached my pallet to the header board.
To determine where I needed to put the posts to support the roof, I made a simple pendulum-style marker (plumb bob) using a socket and some string. No need to be perfect here, just pretty close.

I dug a small hole under where I marked each corner, then drove in these metal post supports (something I had leftover from another project) with a sledgehammer. For posts, I had some 4′ sections of 4×4, but that left me short of the roofline.

To make up the difference I made a 2×4 frame and attached it to the top of each post, and the bottom of the roof. To frame in the base I used 2×6 lumber leftover from last years skating rink 😮
Something else I had lying around that was the perfect height is the beautiful cast iron grate from an old bench, that I used as an insert, and to support the roof.

At this point the basic structure is complete. All that’s left is to box it in a bit and make it pretty.
To box in the structure, I used a scrap sheet of particleboard and plywood for the back and side. To fill in the 16″ or so I was short on the side, I used cut-up pallet boards.

I used double black shingles for the roof. Not quite the same but close enough of a match that it’s not noticeable compared to the original shingles.
Tips for laying shingles
Lay the first-course upside down so the slits in the shingles face up toward the roof peak. Lay the second row of shingles on top of the first one. This gives you a nice strong drip lip and a nice straight line to start with.
Do I need underlay or roofing felt under shingles?
Underlay is not necessary for sheds or carports, in fact many local building codes don’t even require it for housing anymore. Use your best judgement based on how wet your area is, and what you are protecting.
To make my new carport match the shed, I used 1×6 to frame off the roof, and box in the posts. This gave me a nice chunky-looking post and roof “beam” and a great surface to stain.
Heres a link if you’re looking for car port plans.
The roof support, posts, and pallet boards received 3 coats of stain, and the plywood and particle board received 2 coats of exterior latex paint. Plywood and Particleboard typically don’t like water, so the latex paint should seal it better and hopefully make it last longer.
Behr Cordovan Brown ST-104
We used Bher Cordovan Brown for all the natural grain woods

Finishing off the esthetics, I dug out a section in front of my carport, and put some garden bed trim in. Then filled it all in with 3/4″ crushed gravel, like a little driveway.

My lawnmower just barely fits in, but it does the job, and now I can store all the bikes in here over the winter.
Is it cheaper to build your own shed
Tough call in todays market. Lumber costs are soaring, but usually you can save a bit of money building your own shed, however a shed kit like the big one in this post was really easy to put together, and came with most of what we needed, so paying a little more to save all the frustration is well worth it in my opinion 🙂
Check out more of our simple DIY’s here


Pingback: Really Good Article about Fixing up my Crappy Backyard