
Stripping sanding and refinishing a custom pine harvest table – DIY Project Furniture Refinishing
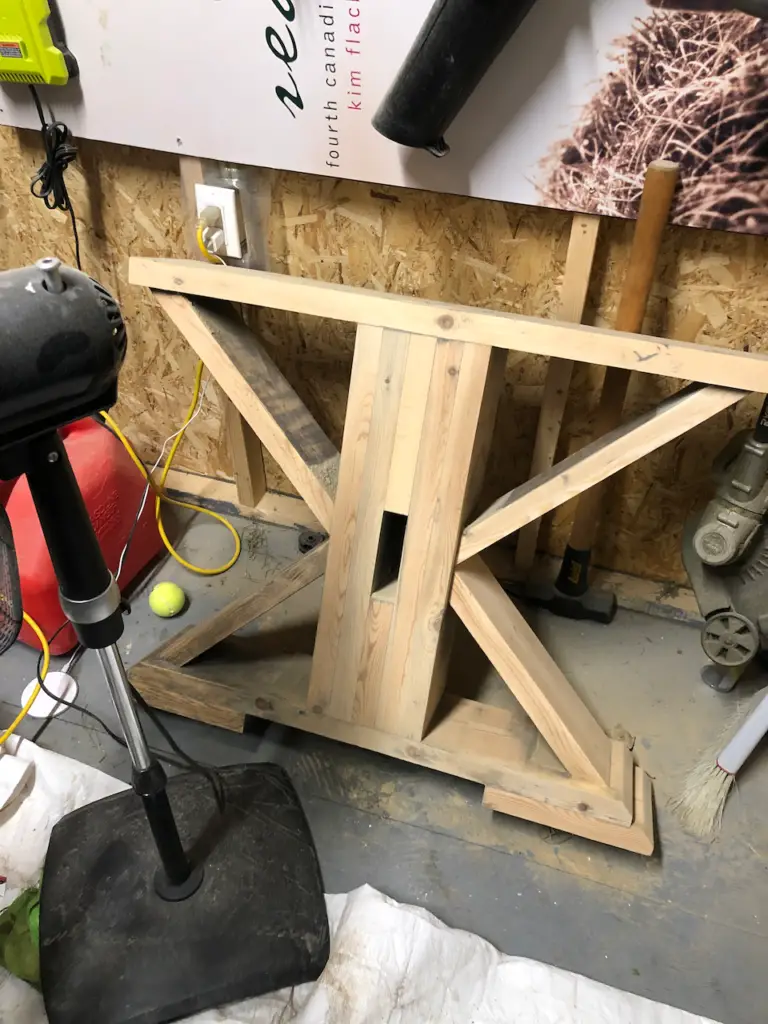
This old custom pine harvest is ready for refinishing. We had this table made 6 or 7 years ago. It was beautifully finished in a weathered grey stain which was common at the time and suited our home well. However, it did see lots of abuse, and permeant marker, glitter, dents and dings, and years of homework engraved into the wood.
Refinishing Process
It was time for a re-do. I haven’t had to buy paint stripper recently and didn’t realize all the “good stuff” is basically off the market and Eco Options are the new norm. After some research, I went with Ez Strip Paint And Varnish Remover.
It took a few coats and lots of scraping and sanding but eventually I removed all the old stain and varnish, and was down to a clean enough surface to start with.
Each section was sanded with 120 grit sandpaper and treated with
Minwax water based Pre-Stain wood conditioner
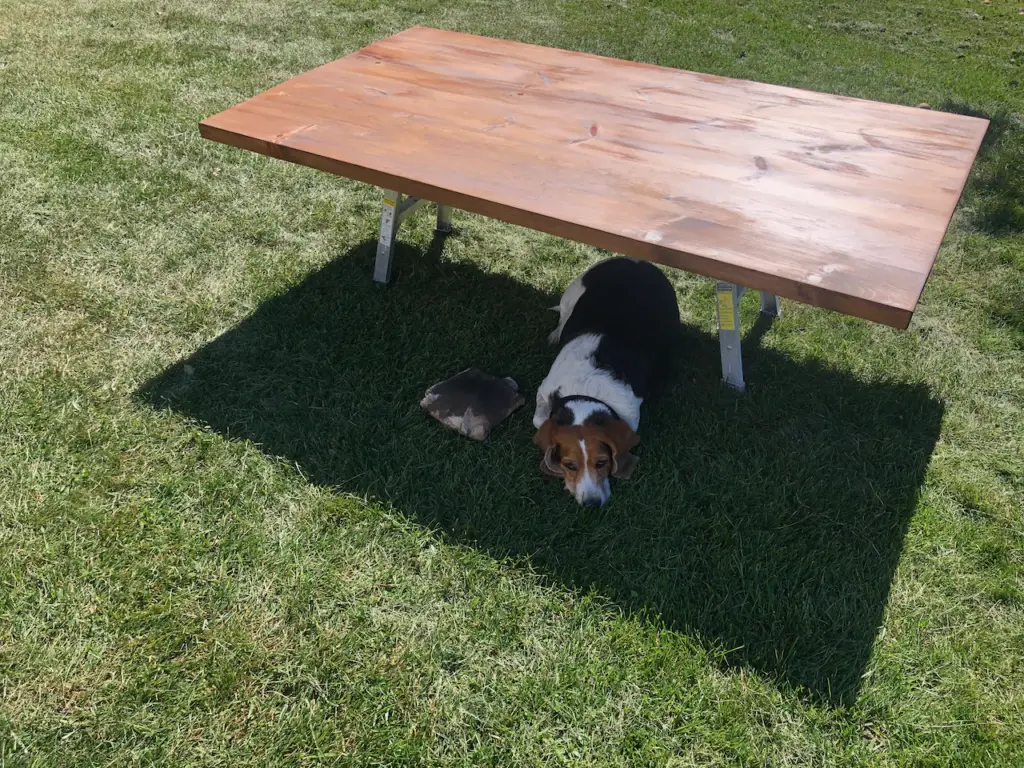
I wanted a more natural look this time, so I chose a 50/50 blend of Minwax Weathered oak 270 and Provincial 211 (Minwax Color guide here) stains to bring back the rich original feel. each section received 2-3 coats depending on how well it was covering. The dry time between coats was about 2 hours.
Once we were happy with the color and coverage we let the pieces cure overnight, then applied 3 coats of Varathane Premium Diamond Wood Finish For Interior, in a satin finish.
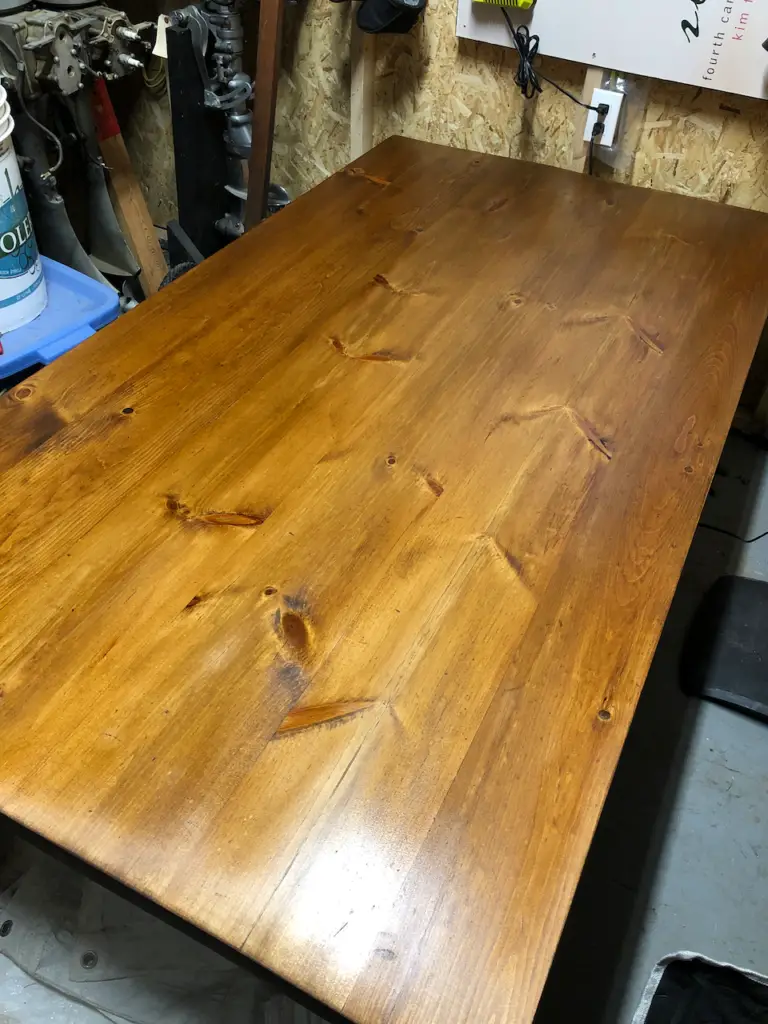
The dry time between coats was much quicker, about 20-30 min. I did a light sanding on some rougher spots with a 220 grit sandpaper to keep the surface smooth as the clear built up.
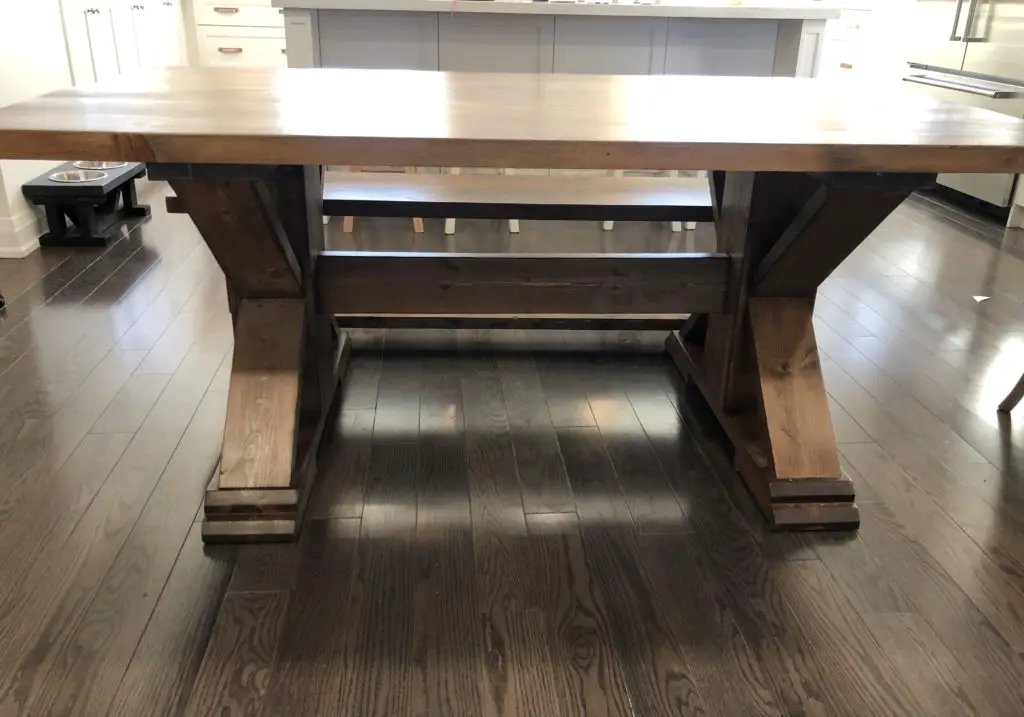
The end result looks fantastic. This harvest table looks brand new and is a much better match in our new home.
I had a ton of fun refinishing this custom pine harvest table. If you enjoyed this, check out some other furniture refinishing diy projects we’ve completed over here https://www.augustdecemberhome.com/category/diy/
DIY Furniture refinishing FAQ How do I refinish furniture?
To refinish furniture with polyurethanes, shellacs & lacquers
Step 1: Clean and remove all the old finish with a chemical stripper and sand paper.
Step 2: Make any necessary repairs using a wood putty that matches the natural color of your furniture
Step 3: Use a wood conditioner to prepare the surface for staining or painting
Step 4: Apply Stain or Paint of your choice.
Step 5: Seal the new stain with a clear varnish or polyurethane in the sheen you prefer.
Step 6: Sometimes a light sanding between coats is required to maintain a smooth finish
Is it better to sand or strip furniture?
Stripping is Faster than Sanding. Paint stripper will remove most of the old finish, but you may still need to sand to get into the small tight areas, and to create a smooth surface to re-stain. It’s almost always better to strip than to sand.
Do you have to remove old stain before restaining furniture?
Yea and no. You don’t need to remove all of the old stain to apply darker stain, but you need to break the surface with sandpaper to get the new stain to adhere. For lighter stains you will need to remove the old finish to get an accurate color. You do need to remove lacquer, varnish or anything that will prevent new stain from absorbing into the wood.
Can I stain over stain without sanding?
Depending on your what you’re staining, it is possible. A Gel stain will not require you to sand the product down to a raw wood finish however its highly recommended that you lightly sand the surface to create a better bond.

